[php] super simple steam login [gamebanana] [tutorials]
The «Sign in with Steam» button is extremely useful for user authentication on websites. It is also extremely simple to use. However, before we write code of our own, you will need to download a couple of PHP files that we will be using to make our system. We will be using Jessecar96’s (Creator of Scrap.TF) SteamAuth PHP class and a PHP class that it uses to interface with OpenID authentication. Go ahead and download/clone this repository. Next, in your server or wherever you are building this system at, create an /includes/ directory and place the SteamAuth folder that we just downloaded/cloned into it. Now, let’s make a simple index.php file that has a link that leads to a login.php file:
<?php require_once("./includes/init.php");
?>
<!DOCTYPE html>
<html lang="en"> <head></head> <body> <?php if($logged_in) { echo "Hello, " . $_SESSION["username"] . "!"; } else { echo "<a href="./login.php">Sign in with Steam</a>"; } ?> </body>
</html>
Now that is all for the index file. As you can see We will have different content depending on whether the user is logged in or not.
Let’s move on to the login file.
<?php require_once("./includes/init.php"); if(!$auth->IsUserLoggedIn()) { header("Location: ".$auth->GetLoginURL()); } else { session_start(); $api_key = "YOUR_STEAM_API_KEY"; $json = json_decode(file_get_contents("http://api.steampowered.com/ISteamUser/GetPlayerSummaries/v0002/?key=".$api_key."&steamids=".$auth->SteamID), true); $steamid = $_SESSION["steamid"] = $json['response']['players'][0]['steamid']; $username = $_SESSION["username"] = htmlspecialchars($json['response']['players'][0]['personaname']); $avatar = $_SESSION["avatar"] = $json['response']['players'][0]['avatarfull']; header("Location: /"); }
?>
This all is rather simple. First, it includes the SteamAuth class we downloaded (which also includes openid.php), then it checks whether the user is logged in via Steam. If they aren’t then it redirects them to the Steam login page which looks like this:

Note that it says that the site will only be able to retrieve public data on the user. This method does not reveal your login username or your password.
Once the user is logged in, Steam will redirect them back to the login page where it will make a request to the Steam API with your API key and their SteamID to retrieve and store their SteamID, username, and avatar in a session and then redirect them to the document root, which would be our index fille.
Lastly, we need to initialize the SteamAuth class. This is done with a simple file we will name init.php which will also go in the /includes/ directory:
<?php require("SteamAuth/SteamAuth.class.php"); $auth = new SteamAuth(); $auth->SetOnLoginCallback(function($steamid){ return true; }); $auth->SetOnLoginFailedCallback(function(){ return true; }); $auth->Init();
?>
Next we can make a logout.php file which will then log the user out:
<?php require_once("./includes/init.php"); session_unset(); session_destroy(); $auth->LogOut(); header("Location: /");
?>
That wraps up this tutorial! You go way more complicated with your login system by using cookies to keep the user logged in or storing the data in a database.
I hope you enjoyed this tutorial!
You can view a mirror of this tutorial here in case the format gets messed up.
Авторизация через steam
Сегодня я решил поработать над авторизацией через Steam и немного помучавшись у меня вышло 🙂
Весь код можно найти тут.
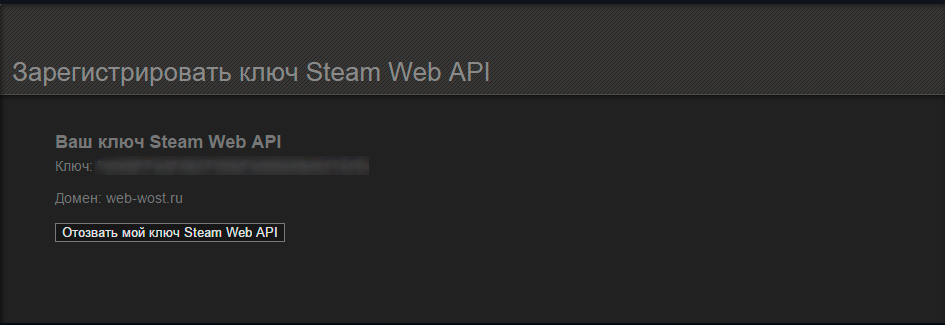
Для начала нужно получить ваш Секретный ключ(Api key), который можно получить тут.
Теперь, как и в прошлый раз, я разберу весь код 🙂
Ну как обычно мы создаем массив для необходимых данных
$steam=array('key'=>'Секретный_ключ','redirect'=>'страница_редиректа');Секретный_ключ дается вам стимом!
Теперь самое время создать ссылку для авторизации:
$link="<a href="https://steamcommunity.com/openid/login?openid.ns=http://specs.openid.net/auth/2.0&openid.mode=checkid_setup&openid.return_to=".urldecode($steam["redirect"])."?state=steam&openid.realm=".urldecode($steam["redirect"])."&openid.ns.sreg=http://openid.net/extensions/sreg/1.1&openid.claimed_id=http://specs.openid.net/auth/2.0/identifier_select&openid.identity=http://specs.openid.net/auth/2.0/identifier_select">Аутентификация через Steam</a>"; // Создание ссылки для аутентификации
echo $link;
Проверяем пришел ли необходимый для нас код и правда ли мы пришли от steam`a:
if(isset($_GET["state"]) and @$_GET["state"]=="steam" and isset($_GET["openid_identity"])) {Если всё хорошо, то получаем данные о пользователе:
preg_match("/^http://steamcommunity.com/openid/id/(7[0-9]{15,25} )$/", $_GET["openid_identity"], $key);
$key=$key[1];
$userInfo = json_decode(file_get_contents("http://api.steampowered.com/ISteamUser/GetPlayerSummaries/v0002/?key=".$steam["key"]."&steamids=".$key));
$userInfo=$userInfo->response->players[0];
Переменная userInfo имеет структуру объекта, а не массива, а значит нужно обращаться к данным примерно так: $userInfo->id.
Ну вот и всё) Спасибо за внимание 🙂