Adding blueprintjs for styling
We will be making use of BlueprintJS in order to style the app. So let’s install it:
In the index.css file, let’s include the css files related to BlueprintJS:
Also, note that we have added styles to center align the page contents.
All done!
Well not quite… We finished our client side code, but now we have the server side to finish up next.
Application architecture
This is how our login flow will look like:
This is how an authenticated request would look like:
Boilerplate application
Note: This section can be skipped if you already have a working application
To get the boilerplate application going I used this guide which uses create-react-app with some tweaks to add an express server. Then I followed this guide to get react-router running.
Keep in mind I am using npm for this tutorial but this can be interchanged with yarn.
I also made sure I had Mongoose installed and connected in my server code and MongoDB running on my computer:
const mongoose = require('mongoose');const mongo_uri = 'mongodb://localhost/react-auth';mongoose.connect(mongo_uri, function(err) {
if (err) {
throw err;
} else {
console.log(`Successfully connected to ${mongo_uri}`);
}
});
Then, using Express, I created two routes that look like this:
app.get('/api/home', function(req, res) {
res.send('Welcome!');
});app.get('/api/secret', function(req, res) {
res.send('The password is potato');
});
For the frontend I created two components with their own corresponding routes which will fetch those messages from the back-end:
import React, { Component } from 'react';
import { Link, Route, Switch } from 'react-router-dom';
import Home from './Home';
import Secret from './Secret';
export default class App extends Component {
render() {
return (
<div>
<ul>
<li><Link to="/">Home</Link></li>
<li><Link to="/secret">Secret</Link></li>
</ul> <Switch>
<Route path="/" exact component={Home} />
<Route path="/secret" component={Secret} />
</Switch>
</div>
);
}
}
And here is an example of my Home component (the Secret component is almost identical):
export default class Home extends Component {
constructor() {
super();
//Set default message
this.state = {
message: 'Loading...'
}
} componentDidMount() {
//GET message from server using fetch api
fetch('/api/home')
.then(res => res.text())
.then(res => this.setState({message: res}));
} render() {
return (
<div>
<h1>Home</h1>
<p>{this.state.message}</p>
</div>
);
}}
Which ends up looking like this:
Now with this working we can get to the fun part!
Create the .babelrc file
The babel configuration file defines the presets used by babel to transpile the React to Javascript EcmaScript version 6 (ES6) code. The babel transpiler is run by Webpack via the babel-loader module configured in the webpack.config.js file as shown below.
js
{ "presets": [ "@babel/preset-react", "@babel/preset-env" ]
}
Create the app component
The app component is the root component for the react application, and it contains the outer HTML, routes and main navigation bar for the react app.
Create the index.jsx file
The root index.jsx file bootstraps the react application by rendering the app component into the app div element defined in the base index HTML file above.
The boilerplate application uses a fake backend by default. To switch to a real backend API, simply remove the fake backend code below the comment // setup fake backend.
js
import React from 'react';
import { render } from 'react-dom';
import { App } from './App';
// setup fake backend
import { configureFakeBackend } from './_helpers';
configureFakeBackend();
render( <App />, document.getElementById('app')
);
Creating authentication related functions
Now let’s create few functions used for authentication. Create a file called authenticate.js inside the root directory with the following code:
authenticate.js
1const passport =require("passport")
2const jwt =require("jsonwebtoken")
3const dev = process.env.NODE_ENV!=="production"
4
5exports.COOKIE_OPTIONS={
6 httpOnly:true,
7
8
9 secure:!dev,
10 signed:true,
11 maxAge:eval(process.env.REFRESH_TOKEN_EXPIRY)*1000,
12 sameSite:"none",
13}
14
15exports.getToken=user=>{
16return jwt.sign(user, process.env.JWT_SECRET,{
17 expiresIn:eval(process.env.SESSION_EXPIRY),
18})
19}
20
21exports.getRefreshToken=user=>{
22const refreshToken = jwt.sign(user, process.env.REFRESH_TOKEN_SECRET,{
23 expiresIn:eval(process.env.REFRESH_TOKEN_EXPIRY),
24})
25return refreshToken
26}
27
28exports.verifyUser= passport.authenticate("jwt",{ session:false})
Creating jwt strategy
Similar to the local strategy, create a file named JwtStrategy.js inside the strategies folder with the following code:
As you could see we are using fromAuthHeaderAsBearerToken function, specifying JwtStrategy
to extract the JWT from the authentication bearer header.
Creating login and registration components
Now let’s create Login and Registration components using BlueprintJS:
Explanation
We start off exporting a function ‘withAuth’ that has an argument ‘AuthComponent’, which is the Component we want secured.
Check Logged In
Render the Secure Component
Installing passport related packages
Let’s install the following packages:
Issuing tokens
Now that we have all the tools in place, we can start issuing tokens to clients.
Note: Here is a quick summary of token-based authentication
First step is we need a secret string to use when signing the tokens. For the sake of this example I will simply define it at the top of my server file
const secret = ‘mysecretsshhh’;
For any real application, you should keep your secret an actual secret using environment variables or some other method and make sure you DO NOT commit it to version control if you happen to be using git.
Next we need to install the jsonwebtoken library which will allow us to issue and verify JSON web tokens:
npm install --save jsonwebtokenLogin route setup
Next we set our auth headers:
app.use((req, res, next) => {res.setHeader('Access-Control-Allow-Headers', 'Content-type,Authorization');next();});
Now just modify the config file!
Woohoo! We’re so close to having a functional authentication app… we have ONE MORE THING, the config.json. This is what is should currently look like:
Other advantages of using jwt:
Create a new Node.js project using the following command:
Open the directory where you have run the above command in your favorite code editor update the package.json file with the start script:
Now run the following command to install the packages:
Now let’s create a file named .env in the root directory of the project.
This file will have all the configurations and secrets used by the server. You will come across these variables throughout this post.
.env files with production secrets should not be pushed to the code base.
In a deployed environment, set environment variables in the server configuration.
Create a directory named utils and create a file called connectdb.js inside it:
As the name indicates, it helps in connecting to the MongoDB instance specified in .env file.
You may use either a local instance or
connect to a cloud provider like MongoDB Atlas.
Now create a file named index.js with the following code:
index.js
1const express =require("express")
2const cors =require("cors")
3const bodyParser =require("body-parser")
4const cookieParser =require("cookie-parser")
5
6if(process.env.NODE_ENV!=="production"){
7
8require("dotenv").config()
9}
10require("./utils/connectdb")
11
12const app =express()
13
14app.use(bodyParser.json())
15app.use(cookieParser(process.env.COOKIE_SECRET))
16
17
18
19const whitelist = process.env.WHITELISTED_DOMAINS
20? process.env.WHITELISTED_DOMAINS.split(",")
21:[]
22
23const corsOptions ={
24origin:function(origin, callback){
25if(!origin || whitelist.indexOf(origin)!==-1){
26callback(null,true)
27}else{
28callback(newError("Not allowed by CORS"))
29}
30},
31
32 credentials:true,
33}
34
35app.use(cors(corsOptions))
36
37app.get("/",function(req, res){
38 res.send({ status:"success"})
39})
40
41
42
43const server = app.listen(process.env.PORT||8081,function(){
44const port = server.address().port
45
46console.log("App started at port:", port)
47})
Here we spin up the server at port 8081 and wire up the route / with a success response.
Start the server using the following command (you may use npm start or nodemon):
Now in the console, you should be able to see the following output:
Our higher component(hoc)
With The AuthHelperMethods all done and ready for duty, we can start building our Higher Order Component. This is a function that returns the component it’s been passed after it does some logic. Let’s begin with creating a new file named ‘withAuth.js’ in the ‘client/src/components’ directory.
Paste the following code into it:
Protecting routes (react-router)
So we have a working login process that will fetch us a signed token from our backend, save it to our cookies, and subsequently use that token to access protected routes on the server:
Saving token
As you probably noticed, the onSubmit method of the Login component is incomplete. We want this method to make a request to authenticate with our backend and save the resulting token to a browser cookie.
Secure passwords
Obviously we can’t just store passwords in plain text, that’s how bad things happen.
To secure our passwords we will use a nice little library called bcrypt. This will allow us to hash our passwords (if you don’t know what that means read this).
npm install --save bcryptServer side
App.js
Set up our server secret:
const jwtMW = exjwt({secret: 'keyboard cat 4 ever'});
The secret string here can be anything you like. For this example it’ll be ‘keyboard cat 4 ever’.
Signup route setup:
Signup.js
Lastly, we have our Signup page…
Add import AuthHelperMethods from ‘./components/AuthHelperMedothds’; to the top of Signup.js and add Auth = new AuthHelperMethods(); to the top of the class.
Now add the following code to the ‘handleFormSubmit()’ method:
Source code and demo
You can view the complete source code of the client here,
the server here, and a demo here.
Submitting the login and registration forms:
Now let’s bind a submit handler to our login form:
Login.js
1import{ Button, Callout, FormGroup, InputGroup }from"@blueprintjs/core"
2import React,{ useContext, useState }from"react"
3import{ UserContext }from"./context/UserContext"
4
5constLogin=()=>{
6const[isSubmitting, setIsSubmitting]=useState(false)
7const[error, setError]=useState("")
8const[email, setEmail]=useState("")
9const[password, setPassword]=useState("")
10const[userContext, setUserContext]=useContext(UserContext)
11
12constformSubmitHandler=e=>{
13 e.preventDefault()
14setIsSubmitting(true)
15setError("")
16
17const genericErrorMessage ="Something went wrong! Please try again later."
18
19fetch(process.env.REACT_APP_API_ENDPOINT "users/login",{
20 method:"POST",
21 credentials:"include",
22 headers:{"Content-Type":"application/json"},
23 body:JSON.stringify({ username: email, password }),
24})
25.then(asyncresponse=>{
26setIsSubmitting(false)
27if(!response.ok){
28if(response.status ===400){
29setError("Please fill all the fields correctly!")
30}elseif(response.status ===401){
31setError("Invalid email and password combination.")
32}else{
33setError(genericErrorMessage)
34}
35}else{
36const data =await response.json()
37setUserContext(oldValues=>{
38return{...oldValues, token: data.token }
39})
40}
41})
42.catch(error=>{
43setIsSubmitting(false)
44setError(genericErrorMessage)
45})
46}
47return(
48<>
49{error &&<Calloutintent="danger">{error}</Callout>}
50<formonSubmit={formSubmitHandler}className="auth-form">
51<FormGrouplabel="Email"labelFor="email">
52<InputGroup
53id="email"
54placeholder="Email"
55type="email"
56value={email}
57onChange={e=>setEmail(e.target.value)}
58/>
59</FormGroup>
60<FormGrouplabel="Password"labelFor="password">
61<InputGroup
62id="password"
63placeholder="Password"
64type="password"
65value={password}
66onChange={e=>setPassword(e.target.value)}
67/>
68</FormGroup>
69<Button
70intent="primary"
71disabled={isSubmitting}
72text={`${isSubmitting ?"Signing In":"Sign In"}`}
73fill
74type="submit"
75/>
76</form>
77</>
78)
79}
80
81exportdefault Login
In the above code,
Verifying tokens
It will be a lot more apparent later why this is useful, but sometimes we need a way to simply ask our server if we have a valid token saved to our browser cookies.
Интеграция клиента с сервером
API
Начнем с API (api/messages.ts):
// адрес сервера
const SERVER_URI = process.env.REACT_APP_SERVER_URI
// сервис для получения открытого сообщения
export async function getPublicMessage() { let data = { message: '' } try { const response = await fetch(`${SERVER_URI}/messages/public`) if (!response.ok) throw response data = await response.json() } catch (e) { throw e } finally { return data.message }
}
// сервис для получения защищенного сообщения
// функция принимает `access_token/токен доступа`
export async function getProtectedMessage(token: string) { let data = { message: '' } try { const response = await fetch(`${SERVER_URI}/messages/protected`, { headers: { // добавляем заголовок авторизации с токеном Authorization: `Bearer ${token}` } }) if (!response.ok) throw response data = await response.json() } catch (e) { throw e } finally { return data.message }
}
Страница MessagePage (pages/MessagePage/MessagePage.tsx).
Импортируем хуки, компонент, провайдер, сервисы и стили:
import { useAuth0 } from '@auth0/auth0-react'
import { getProtectedMessage, getPublicMessage } from 'api/messages'
import { Boundary } from 'components/Boundary/Boundary'
import { useAppSetter } from 'providers/AppProvider'
import { useState } from 'react'
import './message.scss'
Получаем сеттеры, определяем состояние для сообщения и его типа:
export const MessagePage = () => { const { setLoading, setError } = useAppSetter() const [message, setMessage] = useState('') const [type, setType] = useState('') // TODO
}
Для генерации токена доступа (access_token) предназначен метод getAccessTokenSilently, возвращаемый хуком useAuth0:
const { getAccessTokenSilently } = useAuth0()Определяем функцию для запроса открытого сообщения:
function onGetPublicMessage() { setLoading(true) getPublicMessage() .then(setMessage) .catch(setError) .finally(() => { setType('public') setLoading(false) }) }Определяем функцию для получения защищенного сообщения:
function onGetProtectedMessage() { setLoading(true) // генерируем токен и передаем его сервису `getProtectedMessage` getAccessTokenSilently() .then(getProtectedMessage) .then(setMessage) .catch(setError) .finally(() => { setType('protected') setLoading(false) }) }Наконец, возвращаем разметку:
return ( <Boundary> <h1>Message Page</h1> <div className='message'> <button onClick={onGetPublicMessage}>Get Public Message</button> <button onClick={onGetProtectedMessage}>Get Protected Message</button> {message && <h2 className={type}>{message}</h2>} </div> </Boundary>
)
Сервер
Переходим в директорию server и устанавливаем зависимости:
# зависимости для продакшна
yarn add express helmet cors dotenv express-jwt jwks-rsa
# зависимости для разработки
yarn add -D nodemon
О том, что такое JWKS и для чего он используется, можно почитать здесь.
Пример интеграции jwks-rsa с express-jwt можно найти здесь.
Структура сервера:
- routes - api.routes.js - messages.routes.js
- utils - checkJwt.js
- .env
- index.js
- ...
Здесь нас интересуют 2 файла: messages.routes.js и checkJwt.js.
messages.routes.js:
import { Router } from 'express'
import { checkJwt } from '../utils/checkJwt.js'
const router = Router()
router.get('/public', (req, res) => { res.status(200).json({ message: 'Public message' })
})
router.get('/protected', checkJwt, (req, res) => { res.status(200).json({ message: 'Protected message' })
})
export default router
При запросе к api/messages/public возвращается сообщение Public message. При запросе к api/messages/protected выполняется проверка JWT. Данный маршрут (роут) является защищенным. Когда проверка прошла успешно, возвращается сообщение Protected message. В противном случае, утилита возвращает ошибку.
Рассмотрим этого посредника (utils/checkJwt.js).
Импортируем утилиты:
import jwt from 'express-jwt'
import jwksRsa from 'jwks-rsa'
import dotenv from 'dotenv'
Получаем доступ к переменным среды окружения, хранящимся в файле .env, и извлекаем их значения:
dotenv.config()
const domain = process.env.AUTH0_DOMAIN
const audience = process.env.AUTH0_AUDIENCE
audience — простыми словами, это аудитория токена, т.е. те, для кого предназначен токен.
Определяем утилиту:
Клиент
Переходим в директорию client и устанавливаем дополнительные зависимости:
cd client
# зависимости для продакшна
yarn add @auth0/auth0-react react-router-dom react-loader-spinner
# зависимость для разработки
yarn add -D sass
Структура директории src:
- api - messages.ts
- components - AuthButton - LoginButton - LoginButton.tsx - LogoutButton - LogoutButton.tsx - AuthButton.tsx - Boundary - Error - error.scss - Error.tsx - Spinner - Spinner.tsx - Boundary.tsx - Navbar - Navbar.tsx
- pages - AboutPage - AboutPage.tsx - HomePage - HomePage.tsx - MessagePage - message.scss - MessagePage.tsx - ProfilePage - profile.scss - ProfilePage.tsx
- providers - AppProvider.tsx - Auth0ProviderWithNavigate.tsx
- router - AppRoutes.tsx - AppLinks.tsx
- styles - _mixins.scss - _variables.scss
- types - index.d.ts
- utils - createStore.tsx
- App.scss
- App.tsx
- index.tsx
...
Логика работы приложения:
Дальше я буду рассказывать только о том, что касается непосредственно Auth0.
Интеграция приложения с Auth0
Для интеграции приложения с Auth0 используется провайдер Auth0Provider.
Для того, чтобы иметь возможность переправлять пользователя на кастомную страницу после входа в систему, дефолтный провайдер необходимо апгрейдить следующим образом (providers/Auth0ProviderWithNavigate):
// импортируем дефолтный провайдер
import { Auth0Provider } from '@auth0/auth0-react'
// хук для выполнения программной навигации
import { useNavigate } from 'react-router-dom'
import { Children } from 'types'
const domain = process.env.REACT_APP_AUTH0_DOMAIN as string
const clientId = process.env.REACT_APP_AUTH0_CLIENT_ID as string
const audience = process.env.REACT_APP_AUTH0_AUDIENCE as string
const Auth0ProviderWithNavigate = ({ children }: Children) => { const navigate = useNavigate() // функция, вызываемая после авторизации const onRedirectCallback = (appState: { returnTo?: string }) => { // путь для перенаправления указывается в свойстве `returnTo` // по умолчанию пользователь возвращается на текущую страницу navigate(appState?.returnTo || window.location.pathname) } return ( <Auth0Provider domain={domain} clientId={clientId} // данная настройка нужна для взаимодействия с сервером audience={audience} redirectUri={window.location.origin} onRedirectCallback={onRedirectCallback} > {children} </Auth0Provider> )
}
export default Auth0ProviderWithNavigate
С сигнатурой провайдера можно ознакомиться здесь.
Оборачиваем компоненты приложения в провайдер (index.tsx):
import React from 'react'
import ReactDOM from 'react-dom'
import { BrowserRouter } from 'react-router-dom'
import Auth0ProviderWithNavigate from 'providers/Auth0ProviderWithNavigate'
import { AppProvider } from 'providers/AppProvider'
import App from './App'
ReactDOM.render( <React.StrictMode> {/* провайдер маршрутизации */} <BrowserRouter> {/* провайдер авторизации */} <Auth0ProviderWithNavigate> {/* провайдер состояния */} <AppProvider> <App /> </AppProvider> </Auth0ProviderWithNavigate> </BrowserRouter> </React.StrictMode>, document.getElementById('root')
)
Вход и выход из системы
Для входа в систему используется метод loginWithRedirect, а для выхода — метод logout. Оба метода возвращаются хуком useAuth0. useAuth0 также возвращает логическое значение isAuthenticated (и много чего еще) — статус авторизации, который можно использовать для условного рендеринга кнопок.
Вот как реализована кнопка для аутентификации (components/AuthButton/AuthButton.tsx):
// импортируем хук
import { useAuth0 } from '@auth0/auth0-react'
import { LoginButton } from './LoginButton/LoginButton'
import { LogoutButton } from './LogoutButton/LogoutButton'
export const AuthButton = () => { // получаем статус авторизации const { isAuthenticated } = useAuth0() return isAuthenticated ? <LogoutButton /> : <LoginButton />
}
Кнопка для входа в систему (components/AuthButton/LoginButton/LoginButton.tsx):
// импортируем хук
import { useAuth0 } from '@auth0/auth0-react'
export const LoginButton = () => { // получаем метод для входа в систему const { loginWithRedirect } = useAuth0() return ( <button className='auth login' onClick={loginWithRedirect}> Log In </button> )
}
Кнопка для выхода из системы (components/AuthButton/LogoutButton/LogoutButton.tsx):
// импортируем хук
import { useAuth0 } from '@auth0/auth0-react'
export const LogoutButton = () => { // получаем метод для выхода из системы const { logout } = useAuth0() return ( <button className='auth logout' // после выхода из системы, пользователь перенаправляется на главную страницу onClick={() => logout({ returnTo: window.location.origin })} > Log Out </button> )
}
С сигнатурой хука можно ознакомиться здесь.
Состояние авторизации
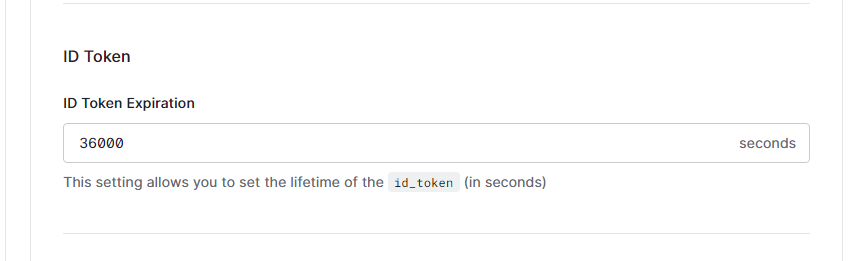
Состояние авторизации пользователя сохраняется на протяжении времени жизни id_token/токена идентификации. Время жизни токена устанавливается на вкладке Settings приложения в поле ID Token Expiration раздела ID Token и по умолчанию составляет 36 000 секунд или 10 часов:
Токен записывается в куки, которые можно найти в разделе Storage/Cookies вкладки Application инструментов разработчика в браузере:
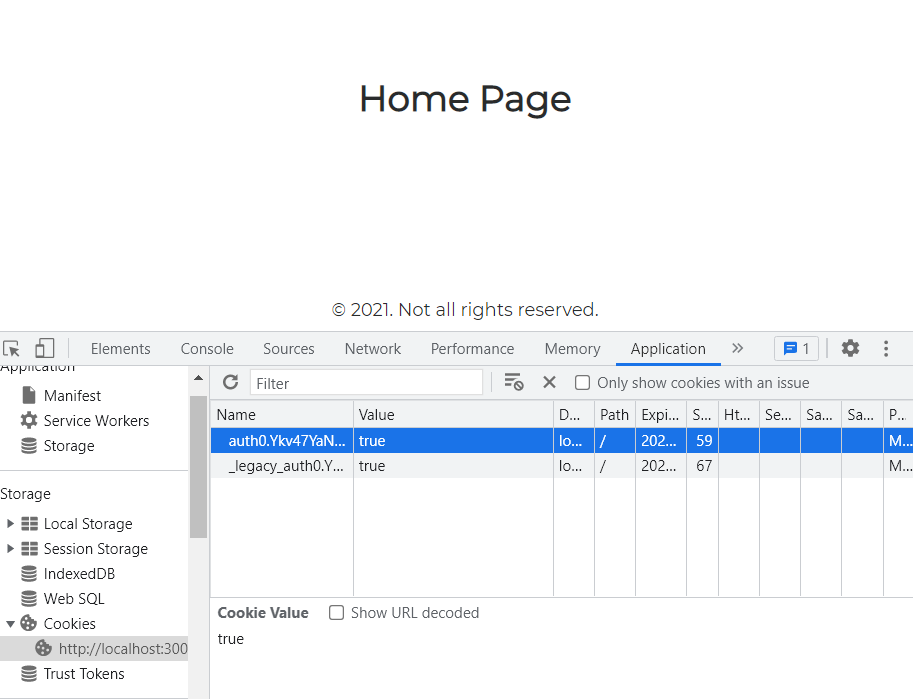
Это означает, что статус авторизации пользователя сохраняется при перезагрузке страницы, закрытии/открытии вкладки браузера и т.д.
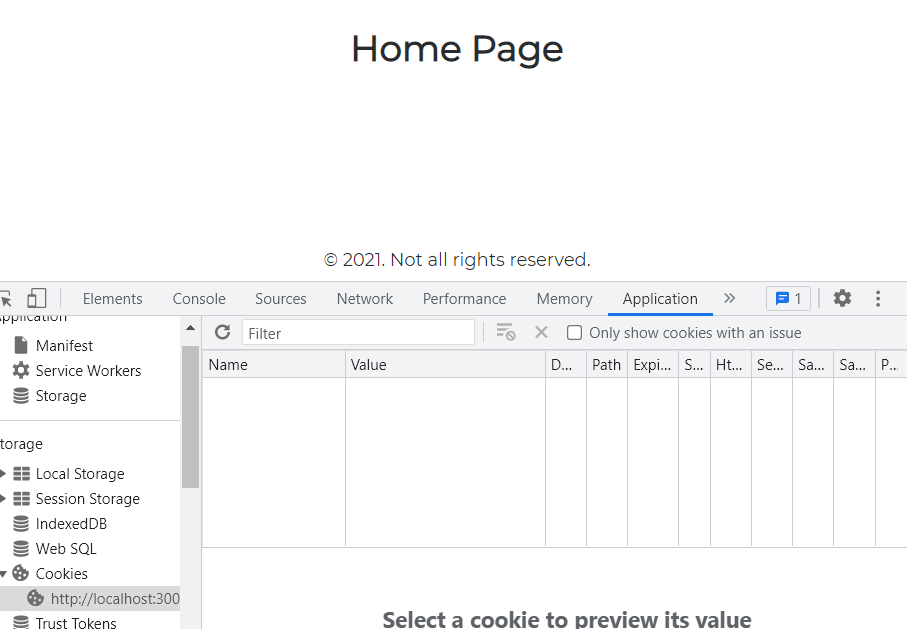
При выходе из системы куки вместе с id_token удаляется.
Создание защищенной страницы
Подготовка и настройка проекта
Создаем директорию, переходим в нее и создаем клиента — шаблон React/TypeScript-приложения с помощью Create React App:
mkdir react-auth0
cd react-auth0 # cd !$
yarn create react-app client --template typescript
# or
npx create-react-app ...
Создаем директорию для сервера, переходим в нее и инициализируем Node.js-приложение:
mkdir server
cd server
yarn init -yp
# or
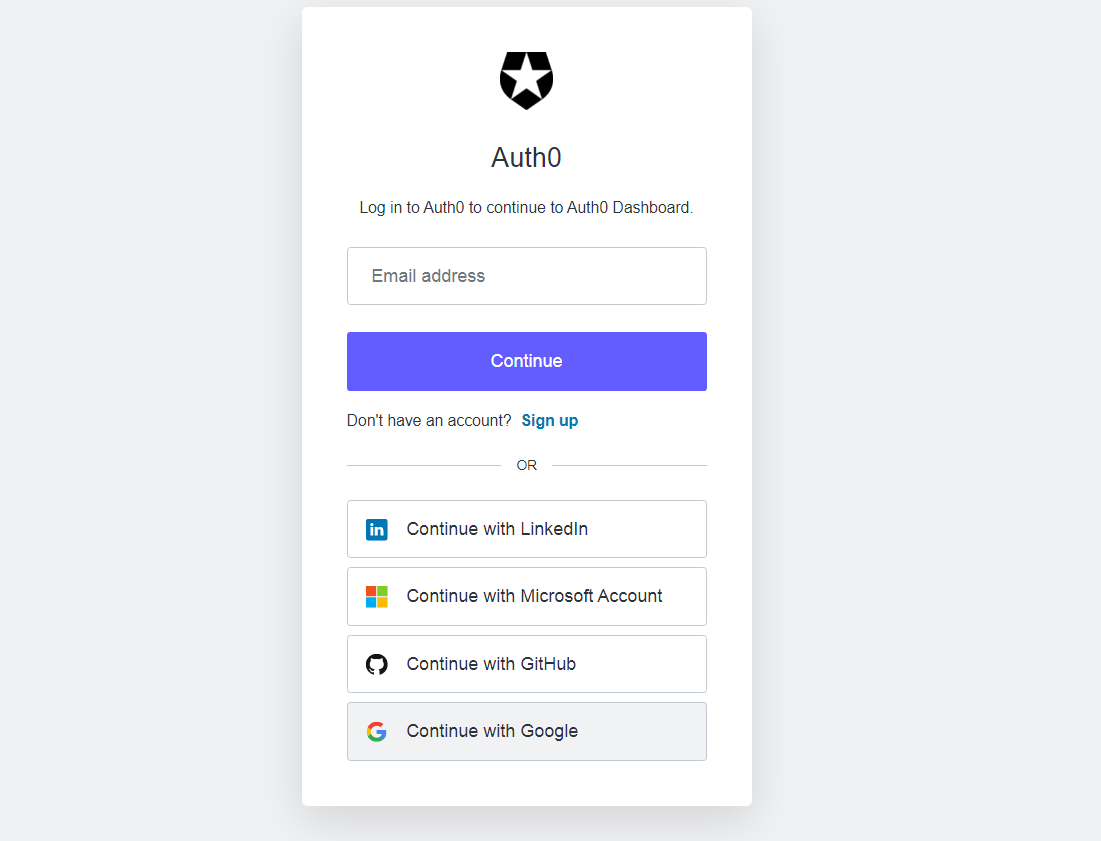
npm init -yСоздаем аккаунт Auth0:
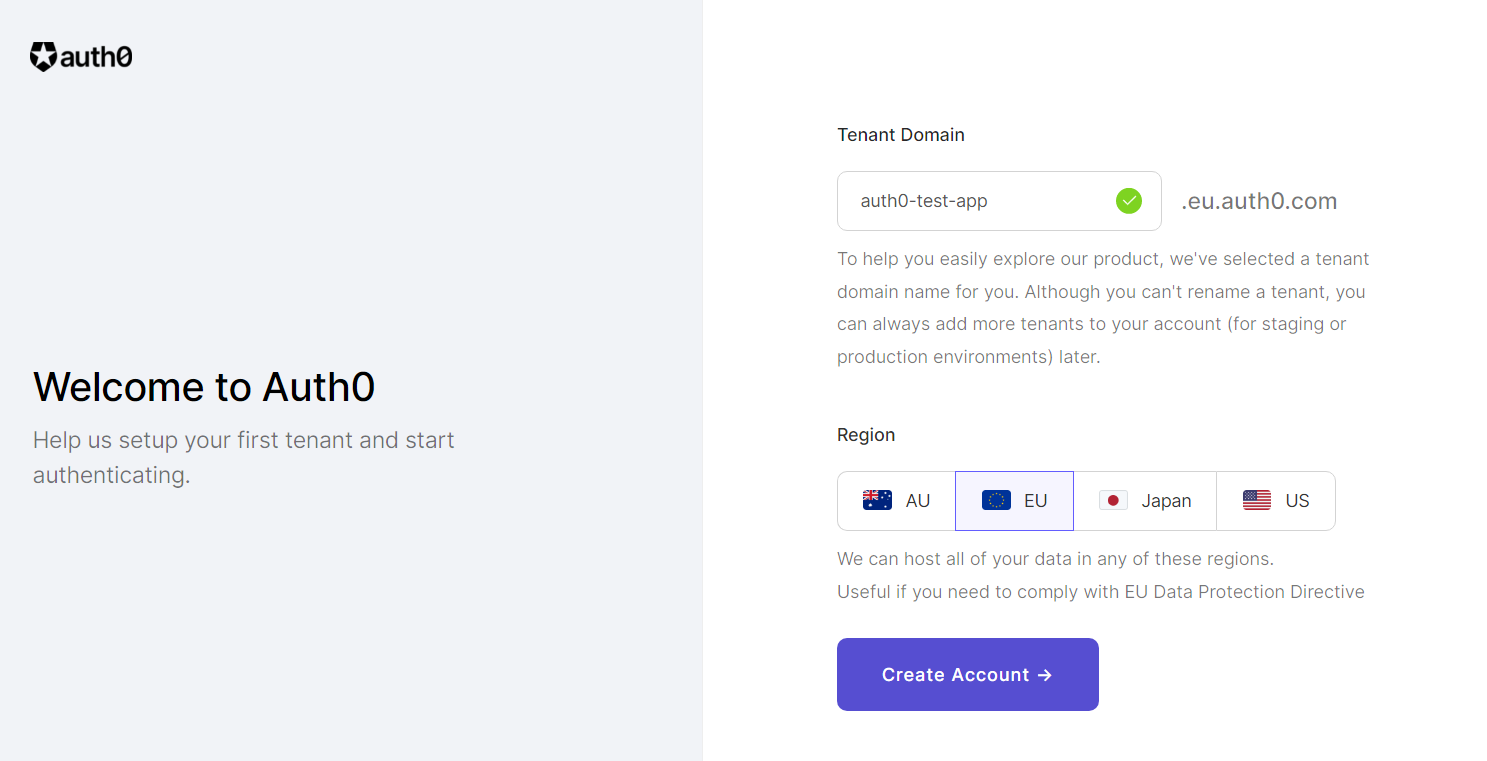
Создаем tenant/арендатора:
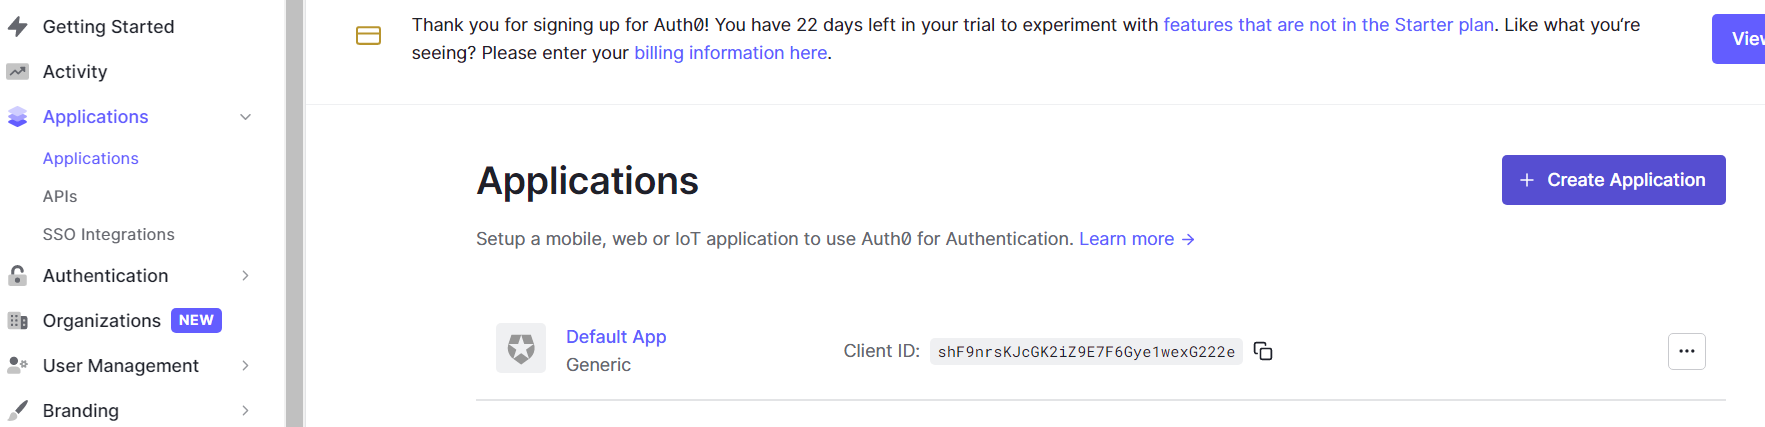
Создаем одностраничное приложение/single page application на вкладке Applications/Applications:
Переходим в раздел Settings:

Создаем файл .env в директории client и записываем в него значения полей Domain и Client ID:
Implementing the front end
Create a new react project using the following command